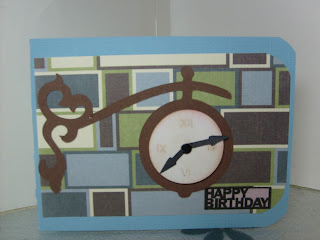
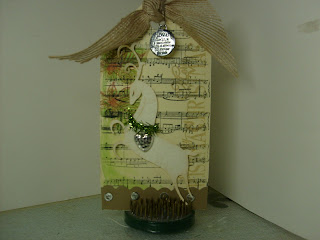
I have been Published

I will have Two cards in the

July 2011 Issue

Also Three cards in the

Sept/Oct 2011 Issue

The Bug Magazine


Search This Blog

Friday, December 30, 2011

My Goal for 2012


 Today I was pondering on the fact that 2011 is over. It is time to start fresh with the new year. So many things I want to do in 2012. So many thing's I want to accomplish. I want to fall in love. I want to see my kids dreams come true. I want to learn to paint. But above all that I want  a closer walk with my Lord and Savior. Joel Osteen sent out an email that said all I was thinking. It covers that we don't need to be perfect we just need to have a heart for him. I have copied it here to share with you.

This time of year, people often take time to reflect and set goals for the New Year. But have you ever set “perfection” as a goal on your list?

Now, that may seem a little strange or unobtainable to many, but really, in God’s eyes perfection isn’t about performance. In fact, it isn’t about behavior at all. What God is looking for is a heart that is perfect toward Him. Scripture says that man looks on the outside, but God looks at the heart. That means that He is more pleased with someone who has a heart toward Him who may mess up than He is with someone doing all the right things for all the wrong reasons.

The condition of your heart is extremely important to God. When you have a right heart, you are humble before Him. You seek His ways. You get up each day with a desire to please Him. You submit every area of your life to Him, and you are willing to make adjustments and receive correction so you can grow and come up higher.

As you prepare for the coming year, make knowing Him your number one priority. Yield yourself to Him and let Him shape your character. Serve Him with all your might and let your heart be perfect toward Him!
Thank you Joel for reminding me of my main goal of 2012.

Thank you...... to you for sharing this past year with me here. I cant wait to see what happens in 2012. I wish you and your family a Happy New Year!! May all your dreams come true.
Terri

Saturday, December 24, 2011

Merry Christmas

Merry Christmas

Christmas | Forward this Picture

It's Christmas Eve and I wanted to take a moment to wish you all a Merry Christmas. The gifts, the gatherings, and all the hustle and bustle are not what makes this Christmas special. I hope you have a wonderful time with family and friends and enjoy the celebration of our Lords birth.

Thank you for making this past year so rewarding for me in blog land. I have now completed my first full year of blogging. Ive learned alot and I have enjoyed every moment of this past year with you guys.

Im hoping everyone gets their Christmas wish. I got mine earlier this week. Now Im waiting to open my gifts under the tree. I hear Santa will be bring me my most wanted CD.. Adele. Im so excited!!! I love her.
I pray we all have a wonderful happy New Year. Happy Crafting in 2012
Take care and be safe.
Terri

Thursday, December 22, 2011

Decoupaged Shirt Box

I did a video on a shirt box I decoupaged with paper napkins. This makes a great way to give a gift. I used Beccons Fast Finish decoupage glue. I really like this over mod podge but you can use that as well.

Thank you for watching this the last video of the year. I wish you and your family a very Merry Christmas and the happiest of New Years.
Thanks for stopping by
Happy Crafting in 2012
Terri


Monday, December 19, 2011

Altered Jewerly Box


This is the finished jewerly box I altered.
 I used burlap and solid foam stamps. At the end I decided to use one big stamp instead of the smaller ones.
                                      Use stazon ink,old jewerly box and some a foam stamp.
   I found my jewerly box at a thrift store for $1.00. It had some damage on the top but otherwise in great shape.
 I stamped the burlap with a large butterfly foam stamp. I applied the burlap with Mod Podge to the top of the jewerly box.
 I added trim and embellished the top with flowers, jewels and trinkets.

This was a fun project to do. I got the idea to do this when I was at Garden Ridge the other day...I saw some dressers that were covered in Stamped Burlap. I loved them! They were gorgeous. So I wanted to try to see if Id like it on the jewelry box. I did!!!


Thanks for stoping by my blog
Happy Crafting
Terri

Sunday, December 18, 2011

Weekly Calendar for my New Kitchen--HUGE


Size came to 26x46


Hello Everyone. I hope you have having a great weekend. All my christmas shopping is done !!!! happy dance!!!!!  so I had time to play in my craftroom. Here is what I made this afternoon.

I have a great new kitchen with a BIG empty wall. I wanted an art project to place on that huge wall. So when  I saw  this weekly calendar. I found this calender while playing on Pinterst the other day. It was perfect. The calendar is made with 8 Photo frames with glass and scrapbooking paper.  

This is a very easy project to do. Choose 8 frames from 5x7 or 8x10 or the 8.5x11. Depending on how big you want to make your calendar. Each of my frames are 8.5x11. I got mine at the Dollar Tree. I cut the letters from Storybook at 3 1/4 in black vinyl. The papers came from a paper pack from Walmart.


 Open up the frame and insert the decorative paper. Place the frame back together. I hot glued all 8 frames together. Then I labeled them by the day. The 8th one is to write notes on or add a quote. I took a dry erase marker and taped string  around the bottom of the marker. I then hung it with a push pin next to the calendar. You simply erase the  glass with a dry paper towel. You get bored with the paper you can change it out. EASY PEASY
Here is where you can see the original http://fey-next2heaven.blogspot.com/2011/09/our-launch-pad-new-weekly-calendar.html


Thanks for stopping by
Happy Crafting
Terri


Friday, December 16, 2011

Merry Christmas Wall Hanging


I usually place a large green wreath here but I like this hanging here too
My glass outside door will protect the sign from the weather.


I made this Christmas Wall hanging from a wall hanging I saw at walmart. They are in the jewelry department. The ones at Walmart were just gorgeous and weren't expensive at all. But why pay $12 for something I could make for less than a $1.00.

I ran to Dollar Tree and bought 3 shirt boxes for a $1. I wrapped the box in green wrapping paper. I used 2
large and 2 small plastic tree ornament's. I used a heavy wire I already had.
I put a hole in the plastic balls with an exacto knife and ran the wire through. Between each ball I made a loop with the wire to hold the ball in place. I then covered the loop with a red pom-pom but a ribbon would twice as cute ( thinking of changing mine). To hide the lip on the ornaments I wrapped tinsel around the lip ( were the wire hanger would be). I used the exacto knife to put a whole in the end and top of 2 ends of the box.

The Merry Christmas letters I cut from card stock from Songbird cart. The angel was cut from Joys of the Seasons cart.

Thanks for stopping by
Happy Crafting
Terri

Thursday, December 15, 2011

Quick trip to Mardi Gra ( New Orleans)..... Ohhhhhh how fun


My brother ask me to make him a Mardi Gra tree. I made him one a few years ago and he loved it. He loves Mardi Gra and has friends in New Orleans. He is heading to NO for New years and wanted to take them a MG tree. He wanted a small tree and also wanted me to decorate it for $20.

To do that I would have to make most of the decorations. MG colors are green gold and purple. I could find plenty of gold in the cheapo section of any Christmas store decoration dept but the green and purple proved harder to find at a bargain. I started off with gold pre lit tree. At the dollar store I found a purple boa, purple tinsel,and purple string beads. I bought white Santa head, white birds and brown/white birds. I dyed them all purple and hot glued them to the tree. I also glittered the inside of a few small ornaments purple. I sprayed painted some large bells I already had purple and some green.

I couldn't find anything in the green color that was at a reasonable price. So I made a few things in green. I glittered the outside of a few Christmas ornaments too. I cut mask and jester hat from green card stock from Designer Calendar cart. I hot glued everything to the tree.

I hear in NO they leave their Christmas tree up until Mardi Gra and just change out the decorations. Now his friend will have her own MG tree. This was a lot of fun to make. Brought back some happy memories for me  too. NO is a beauitful city. If you ever get the chance to go you should.

Thanks for stopping by
Happy Crafting
Terri

Wednesday, December 14, 2011

Reindeer Noses

I wanted to share with you these adorable little Reindeer Noses pouch I made yesterday.


They are so simple and quick to put together. They would make a great treat for any office or kiddos treat bags.
   They consist of 8 Malt Balls and one Cherry Sour candy. You could use a simple sandwich baggies. Here I used a treat bag cut down to 6 inches. I printed the sentiment off my computer onto card stock. Then used a circle punch (1 1/2 inches) to cut them out. I cut the scalloped circle from my cricut at 1 3/4 inches. I placed a solid white circle on the back of the red scalloped to write a sentiment. I tied it with red and white yarn.
   I made 16 of these yesterday and they took no time at all.... Easy peasy. You are sure to get a smile when you pass theses around the office.
Thanks for stopping by
Happy Crafting
Terri

Tuesday, December 13, 2011

Happy 31st Birthday Card


                                                     Hello everyone!
This is a card I made for a friends daughter's 31st birthday. I started with a 5x7 card and rounded one edge.
The clock from the front was cut from the Picturesque Cart. The cake was cut from Birthday Bash. The inside sentiment was printed from my computer. I used a center key on my cricut to cut around it with  Elegant Edges cart. The 31 was cut from StoryBook cart. I used SNOW-TEX for some texture on the cake.
This was a fun card to make. Have a great day. Thank you so very much for stopping by my blog.
Happy Crafting
Terri

Monday, December 12, 2011

Tims Tag # 12 Final Tag


Wow, what a tag Tim had for us this morning. I knew when I saw it that I was in trouble. I didn't have the little lady he had displayed on his gorgeous tag.  I also do not have any of his tissue paper. BUT I DO WANT THAT ( pretty please Santa).....So I had to improvise.

 I just cut out by hand a  body out of card stock. I did have a great crown and wings. They were all one necklace this morning. I cut them apart and glued them to the tag. The heart and the snow flake ( attached to a silver  button) are all from my stash. I had a paper napkin that had some script on it. So I fringed it and made a flower. I loved the look for the flower and plan to use that again.The letters I cut from Storybook at 3/4 inches and painted silver. I used tinsel for the bottom. I used a script stamp for the background. Then painted  the tag white. Then turned the tag and stamped a music note stamp across the tag.

If I had  the little lady I would have loved this tag. Some things you just cant skimp on. You have to give me credit for trying LOL
Thanks for sticking with me for the 12 Tags. I had fun! I hope you did too. The comment's have all been so nice. Thank you all!!
Tomorrow I will NOT be posting a Tag :)
Happy Crafting
Terri

Sunday, December 11, 2011

Tim's tag #11


Today's tag had some great techniques but I didn't have the time to execute them all. I do have some Shrinky Dink that would have worked. Today however was my Christmas shopping day. So I set out early this morning with a friend to get all the shopping finished. We managed to dwell our list down a bit. Next week I will get the hard to shop for people ( you know who you are), all finished up.


So here is what I did. I cut the tag at 3 inches out of embossed blue card stock. The Santa is from a stamp set I have. I inked around him and colored in his suit with a black marker. The Merry Christmas was printed from my computer. I inked round it too. I hand cut the branch and added tinsel. I splattered the tag with silver metallic ink for the back ground.

That's about it. Tomorrow is the last day for the tags. We will see what Tim has in store for us. Im sure it will be fun.Thanks for stopping by
Happy Crafting
Terri

Saturday, December 10, 2011

Tims Tag #10 ( Now my fav!!!!)


Oh my I loved loved loved !!!!!!!  this technique. It was so simple and ended with beautiful results. I will be doing this again. I didn't have his facets but I did have his Fragments. Mine are plastic the facets may be glass. Either way the results look the same. I got my picture of Santa from a book my Dover that I have had for 10 years. It is filled Victorian scenes. I cut out the Santa's then applied the packing tape. Then soaked them in water and rubbed the backing off. I added foil from my kitchen. Applying it with Glossy accents. Then I added glossy accent to the Fragment piece and added my picture. I loved the results. I used a music stamp I have for the background. I also choose to use small bells instead of small ornaments at the bottom.

I have learned so much this past week. I cant wait for the next two tags.
Thanks for stopping by
Happy Crafting
Terri


Friday, December 9, 2011

Tim's tag # 9

I loved this tag as well as all the others. I didnt have the stamp he used. I used an emboss folder instead. I started out with a red tag. Ran that through the embossing folder. Then I inked lightly over the raised image. I didn't use any embossing power on this tag.
 The candle was cut from the cart Christmas. This cart came with my Gyspy, so I don't have a book to give you a page number. I cut it at 2.12. The black base for the candle was cut by hand. The letters are from Storybook cut at 1 inch. The leaves were cut the same as the first tag. All from Stretch Your Imagination cart, as was the swirl.
Thanks for stopping by my blog
Happy Carfting
Terri

Thursday, December 8, 2011

Tims Tag #8 and Flashlight Collection


Oh my where to even start with this mornings tag. When I opened Tim's web page and saw this tag (I will be honest), I thought I need to skip this one. I didn't have any of the stamps or gears that could even come close to his tag. But I loved this tag, so I wanted to try.
He is so talented. With the help of my Cricut and a few carts and the net. I was able to make a tag I loved. Here is the list of the things I used and where I got the prints or cut from.

Tag base Picturesque cart cut at 3 inches. I inked red and green then went over it with brown ink. The white lines were made with white paint and the edge of folded paper. I drug the paper through the paint then tapped it to the tag.
Joy   letters I had on hand. I went over them with glossy accent ( wasn't dry in pic)
Tags   Smile stamp is from a stamp set I have
Hand   I used the same stamp set as above but printed a small hand from the net cut and pasted it to the stamp.
Men  I looked for prints on the net. Printed them out cut and pasted them ( loved it) Fast and easy. I hand cut the holly for the hat ( I loved the punch of color, Tim is so creative) add the red berries with the end of a paint brush and red paint.
Clock   face printed from the net. I went over it with silver ink. Cut and pasted it to tag. I hand cut a clock hand painted it sliver.
Silver tag at bottom was from my stash.
Gears cut from textured Kraft paper. Then painted with metallic paint. All 4 were cut from Accent Essentials cart
page 66 cut at 2 and 1 1/2 shadow
page 39 1 inch
Page 33 ( top gear) 2 inches left unpainted
On the med and small gear I cut off every other stroke.

Also I didn't have a pen to add to my tag so I added a paint brush instead. I cut it off an old brush I had and dipped the tip of the brush in silver metallic paint.


Wow this was a wild  ride. I must admit  I loved the results.

Oh I forgot to mention. The light bulb hanging at the top came from my Flashlight collection. Here is a pic of a very small selection of my 100's of flashlights. I collect flashlights from the early 1900s to the 70's.
Thanks so much for stopping by
Happy Crafting
Terri

Wednesday, December 7, 2011

Tim's Tag # 7


Once again I was introduced to a product that I didn't even know existed.. Glassine Paper? I have never heard of this paper but I think I would love a pad of it. It has so many possibilities. Thank you Tim for giving us such wonderful toys to play with.
So without Glassine paper I had a dilemma with this tag. That paper was such a important part of the look of this tag. I dug through my stash of stuff and discovered I had a very close cousin to Glassine. It had the same weight, the same crackle effect and the same look ( once it was inked up) I used Colored Vellum paper. I'm sure clear or white velum would be the same once it was inked up. I did have 3 Ranger reinkers ( red, blue and green ) I joined a Ranger page swap not long ago and bought them for my pages. So I got out the green reinker. I cut my holly leafs first from the vellum from Joys of the Season at 6 inches. I cut out 2, then I cut away everything except the leaves. Then I crinkled them and then inked them. The branches were cut at 1 1/2 inches from Picturesque. The tag was also cut from Picturesque at 3 inches. The sentiment tag was cut from Elegant edges at 3 inches. I did ink my pearls red. For the tag all I did was distress with brown ink.

I do love this tag. Now I have a new use for my velum  paper that I love so much.
Thanks for stopping by
Happy Crafting
Terri

Tuesday, December 6, 2011

Tims Tag #6 (maybe my favorite)


Wow !!!! tag # 6 and I am still impressed with Tim's skills. I have never used foil with an embossing folder. I have to say I LOVE it. When you sand off the color the silver comes out. Its looks amazing. Perfect for anything Christmas.


Once again however I did not have any of his supplies on the list. So I used 4 embossing folders I had, foil from my kitchen and acrylic paint and a sanding block. I got a great result.

I embossed the folders that looked "christmasy" (anything that has a swirl or tree), cutting out sections I wanted to use. They need to be glued  raised side down on a tag (cut at 6 inches from Joys of the season). I then picked 4 colors of paint and painted lightly on a heavy coat of paint. Once that was dried I sanded off the top layer. The silver from the foil popped out. I love that look. I think I will invest in some foil papers. I know they will do an even better job than the foil from my kitchen.
The wreath was cut at 2 inches from Joys of the Seasons. I painted it several shades of gray and then green. I added dots of red paint for the berries. I tied it with some red and white yarn. I went around the edges of the tag with black paint. I did use clear embossing power over the finsihed tag. It gave the tag an even better shine.

This is a technique I will do again. I really like the look of the foil.

Thanks for stopping by
Happy Crafting
Terri

Monday, December 5, 2011

Tim's Tag #5


Once again Tim has fabulously amazed me. I loved his new stamps. Problem.. I don't own any. So I used pattern Christmas paper, ink and acetate. Here is how I did it..

Tag was cut from Joy of the Season as was the acetate tag ( I used packaging) at 6 inches. I inked the pattern paper tag with red ink. The wreath was found on Martha Stewart's seasonal cake cart page 59. I cut it 4 times at 3 inches. I cut it apart and layered it with foam tape. Then I added ribbon and pearls.
I layered the tag with a plain white tag, then the pattern paper ,then the acetate. Added the wreath. Then I used black stazOn ink on the acetate.

I really like the tag but Id really like to have his cool stamps too. I think they made my want list. Are you listening Santa????? hint hint :0
Happy Crafting
Terri

Sunday, December 4, 2011

Tim's Tag #4


Tim's Tag #4.                      I love love love this tag

 It is so simple and adorable. I just wish I had his snowman die. He has such attitude.So adorable

 My tag was cut at 6 inches from Joys of the Season. I did find a snowman  ( Joys of the Seasons cut at 51/2) on my carts that worked well. I also didn't crackle. I have crackle paint ( not Tim's) but choose to dry emboss inside. I then worked snow-tex into the raised areas. I then took a baby wipe and wiped it back off. It gave a heavier look than the white chalk ink I had. Then I took some blue ink and spotted the tag with that. It gave it a layered look.
Since I dry embossed the tag and the snowman. I did not mask and I didn't used stains.
I also added some Snow-Tex and glitter glue to one side of the snowman.

I cut the snowflake from Joys also at 2 inches. I cut it 3 times and layered it to give it some weight. Since I didn't use grudge board.

The numbers were not cut "in" the snowman the way Tim's was. I cut them out of craft paper at 2 inches from Storybook.Then stamped the numbers with a music note stamp. I covered them with Glossy accents and glued them to his body. I used a LOVE charm I had. I tied it with the tinsel and tulle on top of the tag.

 Over all an easy tag to duplicate. I'm happy with the results. Makes me want so many of his wonderful product's!!
I have worked on tag #3 and I think I have given up. Without a stamp that has a dry embossed folder with it. I don't think you can get the results close to his beautiful tag, If I come up with something I will update the post!

Thank you for stopping by my blog
Happy Crafting
Terri

Easy Fast Economical Christmas Present


Download the patten here   http://www.thediydish.com/promo/theDIYdish_Season4_Episode1_dressformpincushion.pdf

I was watching the new My Craft Channel. http://www.mycraftchannel.com/
   Kris and Kim have a great show on that channel. The first episode for this season showed them making a cutest pin cushion. It was a dress form to hold your decorative pins. I just loved it. I have not sewn anything also two years. I was excited to have my new sewing area in my craft room. So I threaded up the sewing machine and got started. Even as rusty as I am this project didn't take a hour. I think the next one I will make in about 30 minutes.
 Here is the link to get their tutorial and the pattern. I hope you enjoy it as much I did.
http://www.mycraftchannel.com/Shows/The-DIY-Dish/?omedia_id=185


  I used a .29 candle stick from the thrift store. The candle stick is ceramic and  4 inch tall. The finished Pin Cushion is about 14 inches tall. I think the next one I make I will use more stuffing. I painted the christmas ornament pink. I then painted it with gloss accent. With  the 1.49 fat quarter I bought at Joanns. The entire project cost less than $3. Now that's an economical  Christmas present.
 Mine will sit on my table and hold not only my pins but pins that were gifted to me. What a great way to display the beautiful decorative pins awaiting for your next project.

Happy Crafting
Terri

Saturday, December 3, 2011

Tim's Tag # 3

Here it is tag # 3. I like the idea of this tag however, I didnt like my results.... I tried Tim's new stamping pad (well it was new to me) it turned out to be harder than it looks. This looks like a simple tag to put together was wasn't. His technique worked but I think I could have gotten  just the same if not better results with my Stampajig. Main problem I encountered was all my clear stamps were not the same thickness. So some of my stamps didn't stamp the first time I stamped them all together.
I used my Fiskars large stamp pad ( see the pic) I arranged all my stamps and stamped on a sheet of felt. Then I used the 3 reinkers I have just as he had done in his video. I then inked up my stamp collection and stamped. But due to the fact all my stamps weren't the same thickness.... it didn't do so well. So I made some adjustments. I think next time I would just stamp them one at a time using the stamp jig.
  I didn't have time to redo the tag but I plan to. Here is how it turned out. I used some of the left over greenery I had from the first stamp. I added some red bling for the berries. Some twine,a bell and I was done. I didn't have a dry embossing folder to make the letters stand out. So the tag looks a bit flat. To do this tag well you would need some of his supplies. You could use large patterned paper with Christmas sentiments printed on it. His way all the stamps have to be the same thickness( from the same set) and you need the embossing folder. So to piece this together out of mismatched products would be difficult. I am going to try this tag again and see what results I get. I'll update this post when I get the new tag made.
Thanks for stopping by
Happy Crafting
Terri
On to tag #4

Tims Tag #2


Tim's Tag #2


I finished Tim's tag yesterday. When I was finishing up writing  my post my electricity went out and I lost the tutorial I had written. I didn't have time to rewrite last night, so today here is tag number #2
   I  loved the second tag as much as the first. If I manage to get all 12 tags done. I want to put them on a tray I bought many months ago. I will hang it proudly in my new craft room.
 Once again I didn't have the supplies he used. Here is how I made my Tim tag my way.

I cut the tag at 6 inched from Joy of the Season cart. That is where I also got my sweet reindeer, cut at 4 inches( i used the flip button). I used embossed paper and inked around the deer before I took it off the mat (see pic).


I used a music note stamp for the back ground. I just bought this stamp at Micheal's last week. You could also use music paper for the back ground. I found a few old piano books at thrift store's. I tear pages out of them for this type of project. They distress very well. I used a smaller Merry Christmas stamp along the side. I stamped it twice in brown ink. The leaves on the top left I just used a generic leaf stamp. If you look at his tag the leaf  outline is very light. Then I colored it in with colored pencils and chalk to give it the distressed look.

I used some twine ribbon I had instead of burlap. I used a silver charm saying love for the charm to hang from the ribbon. I used stazOn Ink around the charm to give it some age. I placed a sticky back metal dot to the top of my pin. It covered the head of the pin. I didn't have a star for my deer. I used a heart instead. The tinsel I have around his neck I got at Walmart in thier  Christmas area. I got 7 different colors. They had then for 1.29 each. I have plans to use them to make Christmas cards. It was a bit to wide for this project but all I did was trim it down on one side.

I used a Friskers edge punch for the bottom and added some sticky back metal dots I distressed.

Now on the tag #3!!

Happy Crafting
'Thanks for stopping by

Terri