


I wanted a small pillow that said Paris but I couldn't find one that I wanted to pay $50 for. All the small ones I found were online and $$$$. So I made one for myself with my Cricut and a foam sheet. First I decided to use the Summer in Paris Cart. I cut my design on multi cut at 7 inches. I don't have a deep cutting blade ( but that would work better). The regular blade cut the thin foam just fine on multi cut. When I went to take the stamp out of the foam sheet it was not cut all the way through. You have to take some scissors and make a small cut along the edge of the design to break the seal from the design to the foam sheet. Then you can easily pull the design from the rest of the foam sheet.
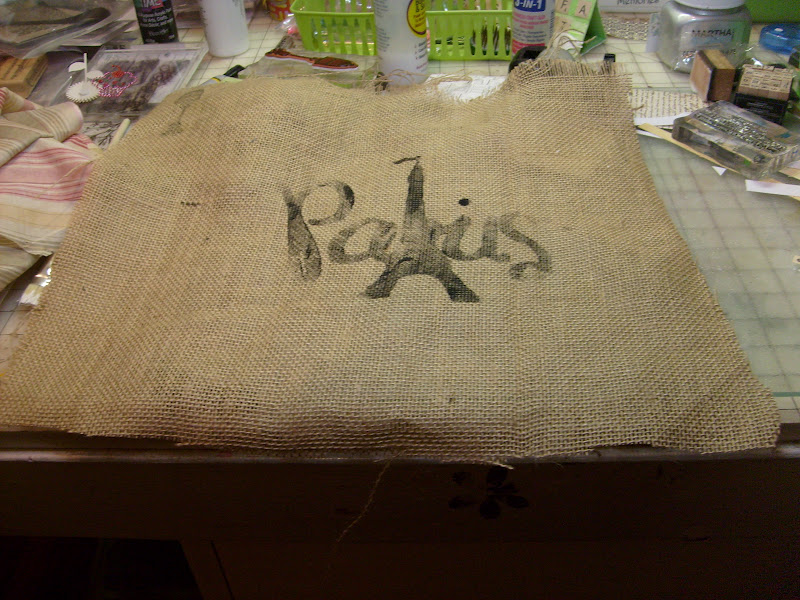
Now I have a stamp in which to stamp my design onto the Burlap fabric. This is a big stamp so I had to place it on a Fiskars foam footed stamping pad. The ink I had wouldn't stamp well on the burlap, so I used black paint.


I used the same fabric I recovered my chair in for the backing of this pillow.
I stuffed the pillow with fiberfill.


I cut the trim apart and added some to the corners of my pillow.


Thanks for stopping by
Happy Crafting in 2012
Terri


Wow what a good and a great tutorial on cutting the foam. Good luck with that room it's look good so far by these 2 pieces.
ReplyDeleteYour pillow is just gorgeous and great idea to make a stamp for the pillow. And your chair came out so beautiful! Cannot wait to see the big reveal! I use to do home deck out of my home for years while my girls were growing up, so I can appreciate all the work you have done. I know it will be awesome as everything you do I just love!
ReplyDelete