I have been Published

I will have Two cards in the

July 2011 Issue

Also Three cards in the

Sept/Oct 2011 Issue

The Bug Magazine


Search This Blog

Monday, October 31, 2011

We call it family

I took this picture this morning. As the dogs and the cat were fast asleep. I have 2 very old dogs and one really mean cat. It made me smile this morning to see them all sleeping on the blankie and sharing. Its the small things in our lives that help us pull the big picture together. This small thing made me stop and count the blessing I have in my life.
Happy Halloween everyone. Have a fun but very safe night.

Happy crafting

Terri

Saturday, October 29, 2011

Keep Calm and Carry On

Instead of working on the reorganization of my craft room or out with friends on a Friday night. I have been busy making a poster for the new craft room. I have loved this poster in the original red and white ever since I first saw it. I had the idea last week to make one for my craft room but make it in green and black to match my room decor.

I was too tired and mentally exhausted to make any more decisions on the reorganization. So I dragged the Cricut and some carts to the living room and started cutting  letters. Here are some pics of the process and the final results. I'm happy with the poster. It looks great on my wall above the computer.

I did this one with contact vinyl lettering but you could easily do it with card stock letters. I bought my green paper for the back ground at Walmart in the gift wrap isle. I cut it at 18 x 30. I also got the poster frame at Walmart, $10. I used a roll of $7.00 black vinyl from Lowes.

I am using that same contact paper vinyl to cut all the Cricut heads for one wall and bird cages for another wall. As soon as I figure out the sizing I plan to add my blog name to the final wall. Im not done with all that yet but  I will show those three walls in another post when I am.
Here are the pics of the process of the Keep Calm Poster.
Happy Crafting
Terri

Here is the poster frame I used.

I painted a white frame around the cardboard backing. Then glued my green paper to it and framed it.

I used a ruler to keep the lines straight. I have a mat on my table with grid lines. This made the process easier.

For the lettering I used the Sans Serif cart, cut at 4 inches. I used Dress up Paper Dolls for the Crown cut at 4 inches use REAL SIZE for the crown! I used black contact paper. It is a vinyl with  texture to it.

Friday, October 28, 2011

Ribbon Organizer

Progress is being made in my craft room make over. But not without a price, I am exhausted. It has been extremely busy week at work. Seems the powers to be have also decided that I needed a make over at work too. I work part time as a Rep of Hallmark. This week a crew of 6 came in to remodel my entire main store.Then as if I didn't have enough to do this week, I got a message from my old landlord. He decided in order to return my full deposit, he wanted me to repaint the kitchen I painted right before I moved. Of course when I got ready to move he said no problem just leave the kitchen the color it is. Now he has had second thoughts and decided white would be a better way to go instead of the green it is now!!! So this past week I have gone from the remodel of the store to the old house where I've painted and then back home to work on my craft room.
Lucky for me my daughter is here to help out. Here are some pics of her organizing my punches and resorting loads of embellishments. Each night I worked on the nightmare that was my ribbon stash. I saw on a blog a hanging ribbon organizer I thought would work great in my new craft room. You can see that blog post here http://inmyownstyle.com/2010/06/how-to-make-an-easy-ribbon-organizer.html. I tweaked it until it worked in my space. I am very happy with the results.

On the web site they used heavier curtain rods that I did. I used some cheap ones from Big lots at $1.50 each. The chain I got from home depot at .68 a foot. I used 2/ 6 ft lengths. Since my rods were cafe curtain rods they do not have finals. I used 2 inch safety pins to hold my rods on to the chain through the small holes in the rod. They work perfectly and are almost unnoticeable. I hung my ribbon organizer on a door that will not be opened or closed.This door leads into a hallway that leads to the bedrooms. You could hang this organizer on a wall or over a window. I used flat metal that is about 6 inches long to screw to the top of my door. This gave me a ledge to hang the chain from. It also made the chain hang about 3 inches from the door. This way there was room for the ribbon spools to spin freeely. It will not damage the door, since I screwed the metal to the top edge of the door.
I have 2 doors that lead from different hallways into my craft room. Both door's wont be opened or closed. I hung my punches on one. The other I made a ribbon spool holder.

My daughter finally gave up and moved the the living room. She needed the sit down to work out the mounds of embellishments.
This is the mess that was my ribbon stash.

I used a 6 inch flat metal bar to hang my chain from. Then I used safetly pins to hold the rod to the chain.

Im so happy with the results. I had no idea I had that much ribbon
I will be posting more of my craftroom make over this weekend. I am hoping to finish a few more projects and get back to posting my cards.
Happy Crafting
Terri

Sunday, October 23, 2011

New Craftroom in Progress

wow!!! One week and still the craft room isn't pulled together. I was hoping to be blogging new cards by now. No such luck. I did work on a project from a table I dragged into the living room last night. I was having such withdrawals and an idea was running wild in my head. I rummaged through boxes looking for my paper trimmer and glue and scissors and paper. I finally found a few things to work with. It really is so much easier when my craft room it put together. I like know where everything is. I did not enjoy cleaning up the mess I made in the living room either. Here are a few pics of the craft room in progress. I have decided what furniture I will be using and where they will go. That was half the battle. Now I have to unbox all my supplies. I hope to purge some stuff and find some things I forgot I had. Over all I am happy with my decision to move. My new house fits the bill perfectly.
Happy crafting
Terri
This table will hold my 3 cricut's and my cuttle bug. Plans are to have a cube system under the table to hold all things dry embossing and die cutting. A long shelve above the table to hold all my carts

Here I had put together the cubes for this side of the room. My goal is to add some Cricut heads from my E2 to this green wall.

Here is the closet that I plan to make my sewing station. As soon as I figure out where to put my paper racks.


My faithful companion. No matter where I am in the house , Sandi is at my side. She is as exhausted as I am. I am working on my table here. I discovered I will need new legs. The other legs have moved their last time. I have had this table for over 10 years. It has been taken down and put back together  6 times. So off to Home Depot  I go. AGAIN!!!!


Monday, October 17, 2011

Where to start!!!!?????

The  move is over and I am settling into the new place. My goodness it was a lot of work to get moved here. I have finally gotten all my things out of storage. Now I have a house full of boxes and disarray of furniture. I'm not even sure where to start the sorting and organizing at this point. I am so tired from all the moving I think after work today I will just sit and stare at all the mess. Tomorrow is my day off, Im sure I will start the process then. At least I hope so. I still have no water in the kitchen due to a problem with the line that runs to the fridge for the ice maker. So a quick trip to Home Depot today should solve that problem. I also discovered this morning my back door was wide open. Seems the lock isn't secure and the cat pushed the door open sometime last night. I hope it was the cat. The door was open and she was sitting in the kitchen this morning. I know I let her out before bed. Don't want a repeat of that. So I will get another lock for that door while at Home Depot today. Then I should be ready to unbox.
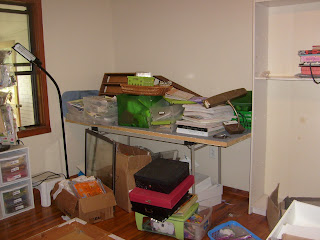
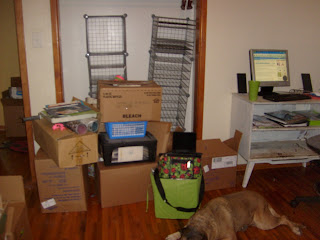
Here is what my craft room looks like. Just imagine 7 rooms that look like this and you can see the mess I have to unbox. I pray this is my last move for a very long time.

I hope to craft very soon in my new room!!
Happy Crafting

Terri

Tuesday, October 11, 2011

My new craft room in progress

This is the color I started with Chocolate Brown
No Primer but a few coats later
With the help of a good friend
I now have 3 cream walls and one cricut green wall
Aww the smell of fresh paint!!! The room in my new house that I have chosen for my craft room was painted chocolate brown. I want the room to be green and white. However when the paint was delivered it was antique white not white. At first I wanted to change it out. But it was high quality paint and it was free!!!! so I decide to try it on the wall and see how I liked it.. I liked it!! So we went with it. I already had the green paint. So we did 3 walls in the cream and one accent wall in the green. My plans are to add some adorable Circuit heads to the accent wall. I will cut those from my Expression 2 cartridge in black vinyl .

I want to give a BIG thank you to my friend Richard. Who has gone above and beyond the call of a friend to help me with this move.The good thing about someone helping you paint that doesn't normally paint their place (he lives in an apt) is they wont be asking you to return the favor and help them paint !!! its a win -win !!

All kidding aside he has been a wonderful help to me. I can not tell you how much I appreciate our friendship. God sent me a wonderful person to be my friend and I love him very much. Thank you Richard! I hope someday to be as good of a friend to you as you have been to me.

Thursday will be Richards Birthday. Happy Birthday!!! Here is the card I made for him.

His card has a "India" vibe. He has a heart for India and its people. He has gone there many times as a missionary
                                                                               

Halloween Card


This card base was made using the Wild Card cartridge, page 48. It cut it at 5 inches with black card stock. The spider web  on the inside was cut  from Paper Doll Dress Up cartridge. On the front of the card  I used a halloween napkin. Watch the video here      Paper Napkin and Cling Wrap Card Video    on how to make a card with a napkin and plastic wrap. I added lace around the circle.  A metal charm was added to  hang from the tree that says "Beware". I know its hard to see in the picture. At the end the card was sprayed  with gold glitter all over the front.

This was a fun and quick card to make. Since I didnt have to buy all the small stamps to stamp this card. The printed napkin did all the work for me and saved me the expense.


Happy Crafting
Terri

The move has started. I will post a few pictures on the next post.

Thursday, October 6, 2011

Box Easel Card and a Box Easel Tag Card


Here is the 3rd video I was trying to get completed before I moved next week. It is a very easy Box Easel card. I used some premade boxes so the card goes together very fast. I also made a Box Easel Tag card that goes together even faster. Let me know if you give it a try. All comments are welcome.

I will be boxing up my craft room next week. The movers are coming on the 15th. Once I get moved and my craft room set back up. I will start posting again. I do have one Halloween card left to post. By the time I get back online Halloween will be almost if not over. Then we will start the fall and Thanksgiving cards. Here in Texas the fall is so welcoming after the hot dry summer we have had.
Happy crafting
Terri


Saturday, October 1, 2011

My Store Front Cards


I saw this card being made on youtube. Check out the awning card video's by Stamping with Di or SlaterDeee or Elainescreations. All these ladies have great how to videos on youtube. This is my version of this card. I loved it so much I made 3 of them. I hope you enjoy them.

Youtube wont let me add text to this video. So I hope it all makes sense. Email me if you have any questions.

Thanks so very much for stopping by my blog and watching my video.
Happy crafting
Terri